Build the graph
On the canvas, you create the logic of your application by adding and connecting nodes.
Adding nodes
- Via the node search menu
- Double click anywhere on the canvas
- Press
Ctrl/Cmd+F
- Via dragging files onto the canvas
- Learn more about Importing data
- Via dragging a connection from an existing node
- OR by copy/pasting nodes
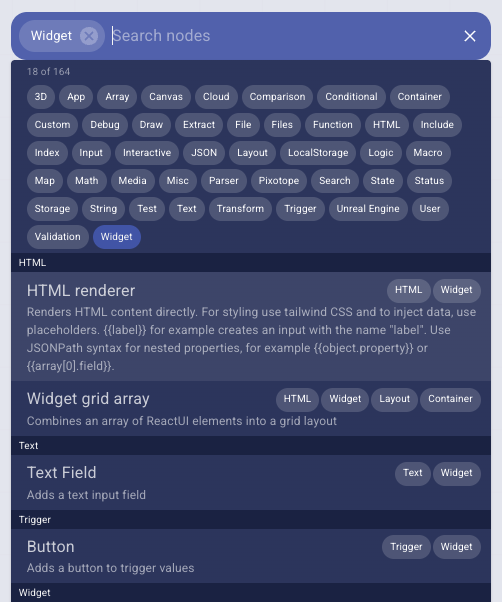
Using the node search menu
- Start typing to search for nodes
- OR click on the categories to add a filter
- OR scroll through the list to browse nodes
- Click on a node to add it to the canvas
- OR press
Enterto add the first result - OR use the arrow keys to navigate the results and press
Enterto add the selected node
- OR press
To remove a filter, click on the category again or use the Backspace key to delete the last filter.
To close the menu, press Esc or click outside the menu.
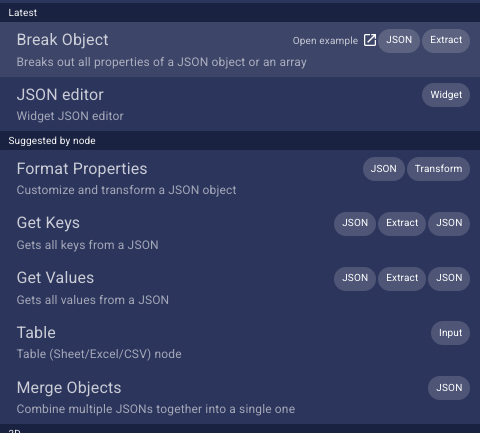
The list is ordered by
- latest added nodes
- nodes suggested based on the connecting
- node
- socket type
- alphabetical order (filtered by category and/or search term)
Connecting nodes
Connect to socket
- Click and drag from an output/input socket to an input/output socket
- Release the mouse button to create the connection
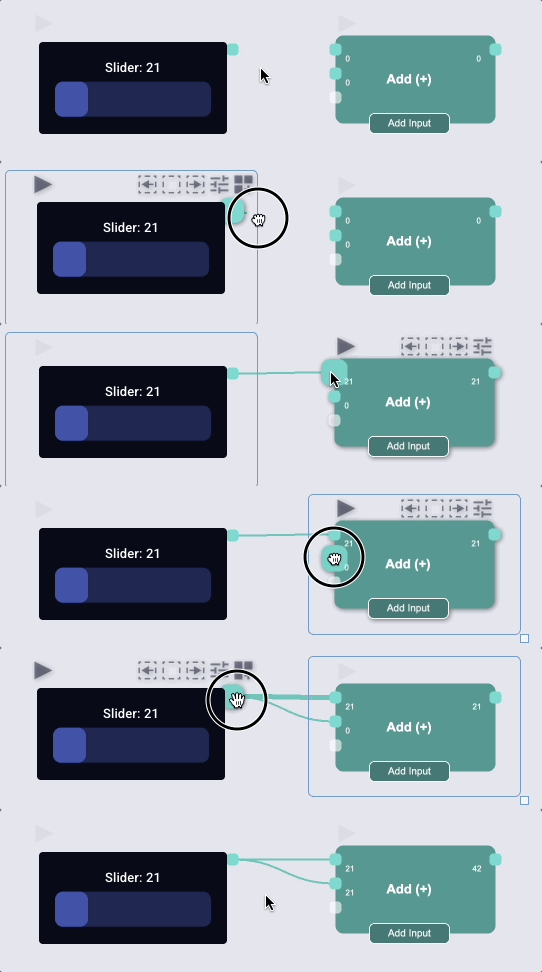
Some nodes have sockets which are dynamically added/removed when connecting/disconnecting.
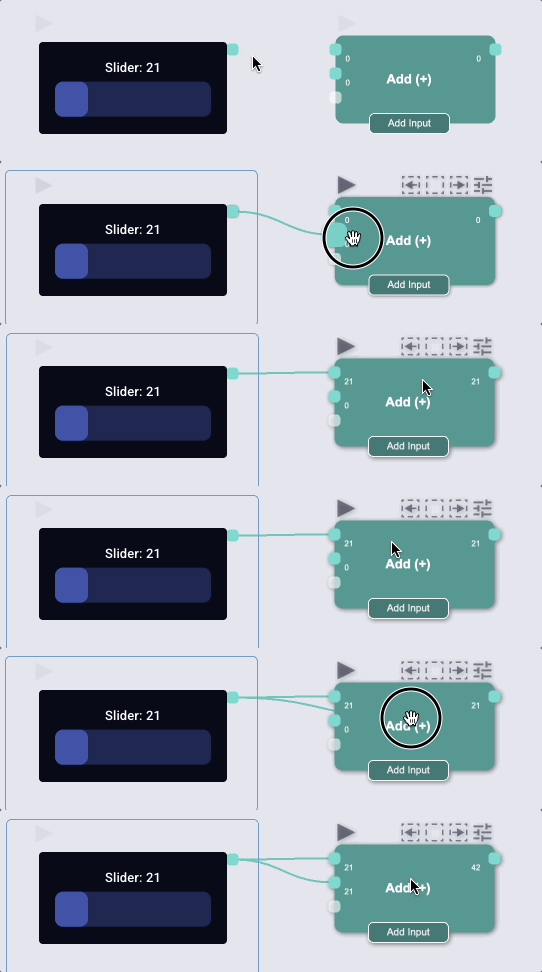
Connect to node
- Click and drag from an output/input
- Release it on a node
This creates a connection to the first fitting socket on that node
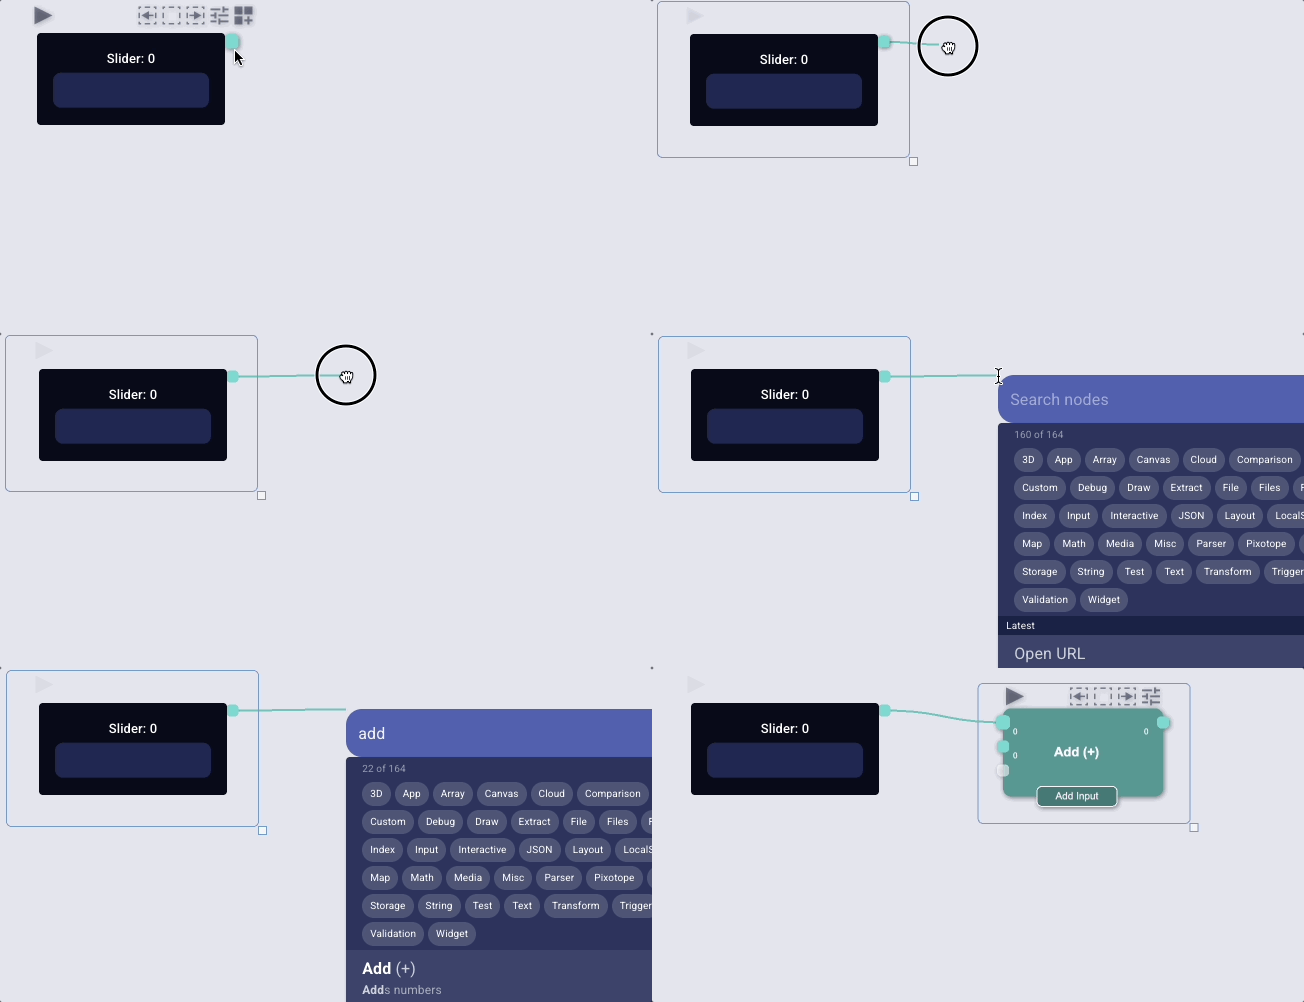
Connect to new node
- Click and drag from an output/input
- Release it on an empty area of the canvas
- This opens the node search menu to add a new node and automatically connects it
- Search for a node and press
Enter - The new node is added and connected
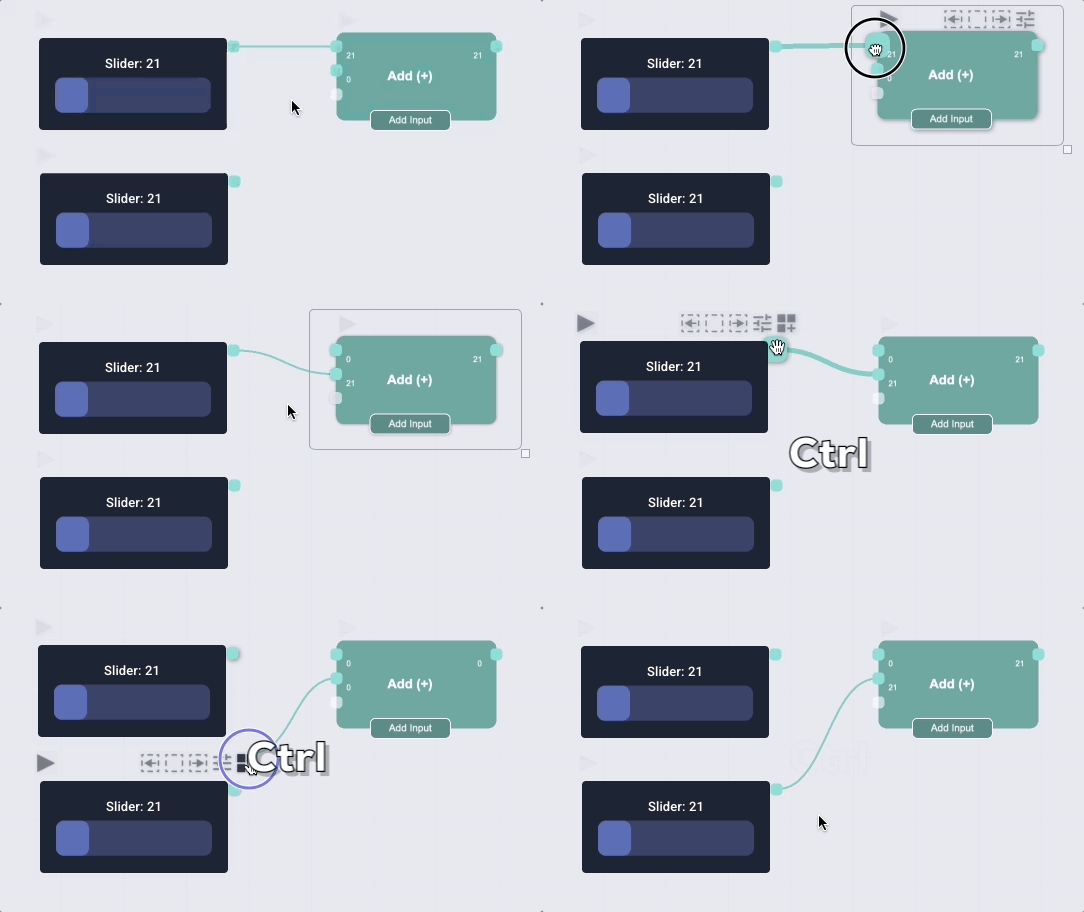
Move the target of a connection
- Click and drag the input socket with an existing connection
- Release it on another output socket
Move the source of a connection
Ctrl+ Click and drag the output socket with an existing connection- Release it on another input socket
Remove a connection
- Click and drag from an existing connection
- Release it on an empty area of the canvas
- Outputs can be connected to multiple inputs
- Inputs can only be connected to one output
Selecting nodes
- Click on a node to select it
Select multiple nodes
- Click and drag on an empty area of the canvas to create a selection box
- OR
Shift+ Click a node to add/remove it from the selection - OR
Ctrl/Cmd+Ato select all nodes
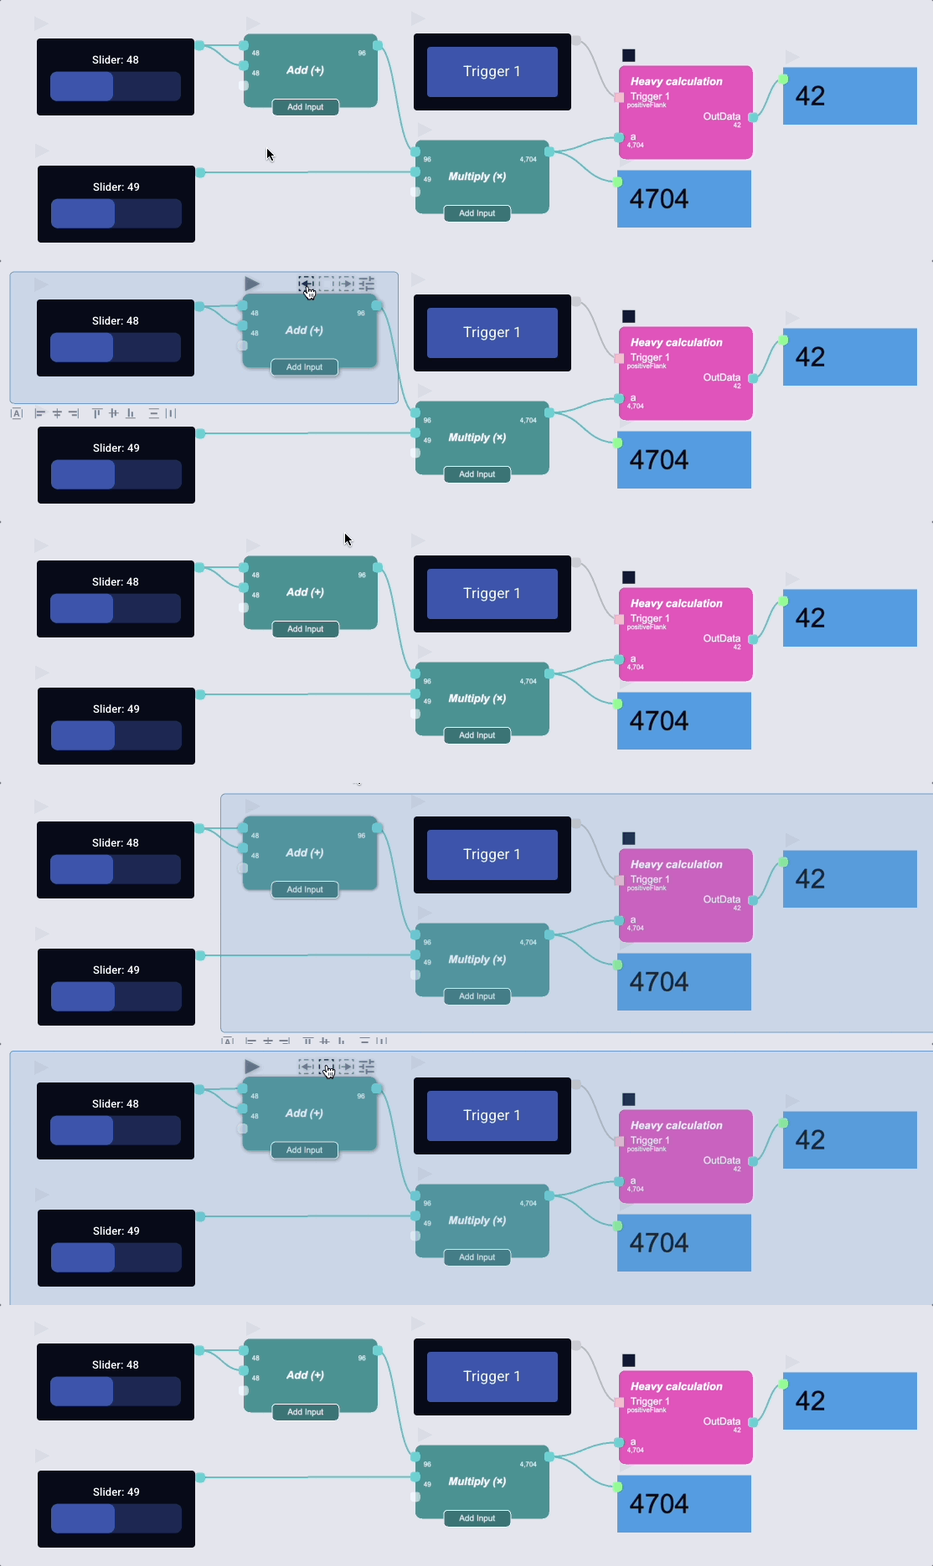
Selecting parent/child nodes
- Hover over a node
- Click on the
- Upstream icon to select all parent nodes
- Downstream icon to select all child nodes
- OR click on the combined icon in the middle to select all connected nodes (upstream and downstream)
Deselect all nodes
- Click on an empty area of the canvas
- Press
Esc
Aligning nodes
- Select the nodes you want to align
- Click on an alignment option in the bottom left corner of the selection
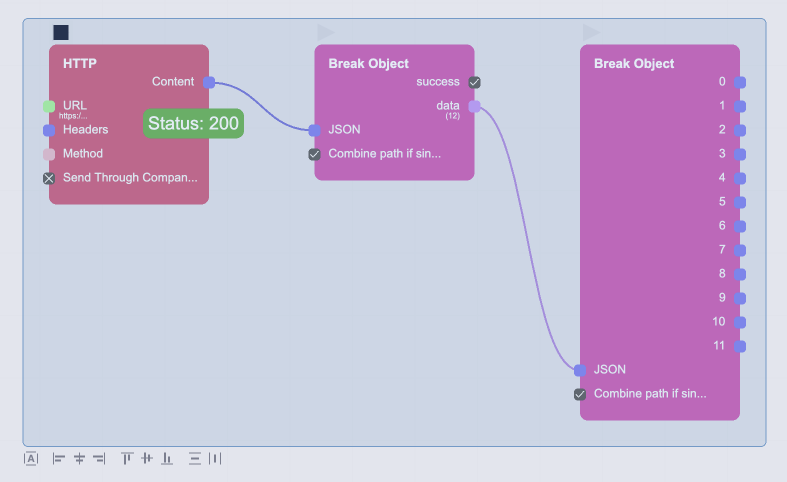
- Auto layout: Automatically arrange selected nodes
- Left: Align left edges
- Center: Align horizontal centers
- Right: Align right edges
- Top: Align top edges
- Middle: Align vertical centers
- Bottom: Align bottom edges
- Distribute vertically: Evenly distribute nodes vertically
- Distribute horizontally: Evenly distribute nodes horizontally
Groups are aligned as one block, so their nodes keep their arrangement inside the group.
Grouping nodes
Groups put a named, coloured frame around nodes that belong together, so you and anyone exploring your app can see its logical parts at a glance. Groups don't change how the graph runs.
Create a group
- Select the nodes you want to group
- Right-click one of them and choose Group
- OR press
Ctrl/Cmd+G
- OR press
A new group is called "Group" and gets the next colour from the palette.
Rename a group
- Double-click the group's header
- Type the new name and press
EnterEsccancels
Change the colour of a group
- Click the group's header to select the group
- Click the colour icon at the right end of the header
- Pick one of the preset colours or any other colour
- The picker opens next to the group, so you can see the colour change as you pick
Move a group
- Drag the group's header or border to move the group with all of its nodes
- Dragging a single node inside the group moves only that node, and the frame resizes to fit
Add nodes to a group
- Drag one or more ungrouped nodes into the group's frame
- The frame is outlined while you are over it
- Release them to add them to the group
Remove nodes from a group
- Select the nodes you want to take out, but not the whole group
- Right-click and choose Remove from group
A group without any nodes left is removed.
Ungroup
- Select the group or any node in it
- Right-click and choose Ungroup
- OR press
Ctrl/Cmd+Shift+G
- OR press
The nodes stay where they are.
- A node can only be in one group, and groups can't be nested yet. Ungroup first to regroup.
- Clicking inside a group's frame still reaches the canvas, so you can draw a selection box or double-click to search for nodes there.
- Right-click a group's header to open the menu for all of its nodes.
- Copying or duplicating a whole group copies the group too. Copying only part of a group copies just the nodes.
- The AI assistant can group nodes too, for example when you ask it to structure or explain your app.
- Grouping, renaming, recolouring and ungrouping can all be undone.